Understanding UV Printing Adhesion: Concepts, Tools, and Tricks

UV printing technology has revolutionized the printing industry with its ability to print on various substrates, including glass, metal, plastic, and more. However, one of the critical factors determining the quality and durability of UV prints is adhesion. Let's dive into the concepts of UV printing adhesion and explore tools and tricks to overcome adhesion challenges.

What is UV Printing Adhesion?

Adhesion in UV printing refers to the ability of the UV-curable ink to stick to the substrate. Unlike other inkjet technologies, UV ink does not require a porous substrate or a coating for proper adhesion. UV ink is cured or solidified on the substrate surface through exposure to UV lamps during the printing process. However, without proper adhesion, the cured ink may not be durable enough for the intended application. Think of UV ink adhesion the same as a paint project at home. Without proper cleaning and surface preparation, you will likely have poor or undesired results. Ensuring strong adhesion is essential for producing durable and high-quality prints.

Key Concepts in UV Printing Adhesion
  • Surface Energy

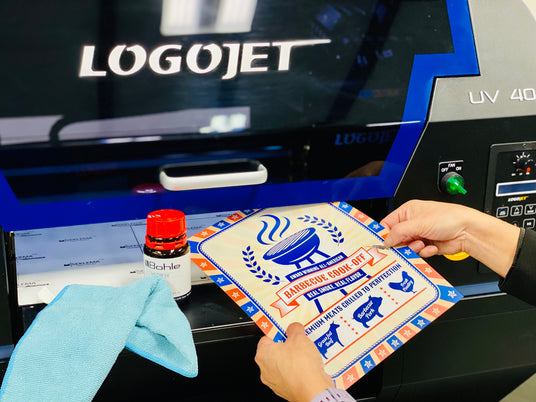
    The substrate's surface energy significantly impacts adhesion. High surface energy materials, like ABS and Polycarbonate plastics, and products coated with a polyurethane or resin like metals, typically provide better adhesion for UV inks. Conversely, low surface energy materials, such as certain Polyethylene and polypropylene plastics, glass, and raw metals, can pose adhesion challenges if no pretreatment is applied. Porous substrates, such as wood or paper-based medias, are generally not affected by surface energy. Having a dyne level kit to test surface energy (shown in photo) can be ideal, as UV digital inks generally perform best in the 40-50 dyne level range.

  • Ink Chemistry

    The formulation of UV-curable inks affects their adhesion properties. Inks are designed with specific chemistries to adhere to different substrates, while providing the right flexibility or rigid needs. Choosing the right ink for the material is crucial for achieving optimal adhesion.

  • Surface Preparation

    Properly preparing the substrate surface enhances adhesion. This involves cleaning the surface to remove contaminants like dust, oils, grease and in some cases even static, which can hinder ink bonding and print quality.  Proper materials like clean, lint-free wipes will help prepare the surface without scratching sensitive materials.

Tools and Tricks to Overcome Adhesion Challenges

Primers and Adhesion Promoters

Applying an adhesion promoter can significantly improve ink adhesion, especially on difficult substrates like plastics. These products create a bondable surface, enhancing the ink's ability to stick.  This process is best applied manually by applying the liquid pretreatment to a lint-free microfiber cloth and applying to printable area before printing.  This process is fast and dries within a few seconds and in some cases can be applied in advance up to 24 hours before printing if the applied area is not handled with fingerprints.   

Always be sure to follow the manufacturers’ application suggestions and guidelines. There is no single best adhesion promoter, as they are each designed for specific substrates and applications. Also, pay close attention to storing instructions and expiry dates, as some have a 6-12 month shelf life.
Surface Treatments

Flame treating, corona, and plasma treatments are all methods used to prepare surfaces for better adhesion of UV digital ink. Here's how they compare:

  • Flame Treating

    Surface Cleaning: Removes dust, oils, and contaminants.

    Surface Activation: Oxidizes the surface, enhancing ink receptivity.

    Mold Release Removal: Eliminates mold release agents for better adhesion.

    DIY Feasibility: Can be done in-house with appropriate equipment, making it accessible for various applications.

  • Corona and Plasma Treatments

    Application: Typically applied during the manufacturing process.

    Surface Activation: Modify the surface at a molecular level to improve adhesion.

    Industrial Use: Often used in large-scale production; standalone devices can be integrated into workflows for continuous treatment.

    DIY Feasibility: Generally not a DIY option due to the complexity and cost of the equipment.

In summary, while corona and plasma treatments are more industrial and integrated into manufacturing, flame treating offers a flexible and accessible method for improving print adhesion in a variety of settings, including those with mold release coatings.

Mechanical Abrasion

Lightly sanding or abrading the surface can create a rough texture, providing more surface area for the ink to adhere to. This method is particularly effective for metals and hard plastics.

Proper Curing

Proper curing of UV ink is crucial for ensuring strong adhesion and durable prints. Insufficient curing can lead to poor adhesion and print durability issues. Adjusting the curing parameters, such as UV lamp intensity and exposure time, based on print speeds, can help achieve optimal results. Regular maintenance of the lamps, including cleaning the UV lamp glass, is essential for proper UV light emission. Additionally, maintaining the correct distance between the UV lamp and the printing surface is important. UV printers are calibrated to have the UV curing lamps at an optimal distance from the product for proper curing. Increasing that distance can result in improper curing, leading to poor adhesion and print durability issues.

Environmental Control

Maintaining a controlled printing environment helps in achieving consistent adhesion. Factors like temperature, humidity, and dust levels can impact the printing process and adhesion quality.

Testing and Quality Control

Regularly testing the adhesion of prints ensures that any issues are detected early. This is highly recommended considering materials can change across various batches and printing with expired inks can also impact durability. Traditional nail scratch, cross-hatch adhesion tests, tape tests, and pull-off tests are commonly used methods to evaluate adhesion strength.  

Consideration of Substrate and Application

Understanding the intended use of the printed object is crucial. For example, printed artwork displayed in a museum typically isn't exposed to abrasion, moisture, or extreme conditions, making most substrates suitable. On the other hand, a printed mug, which undergoes frequent handling and exposure to wear and tear, demands the best possible adhesion. Offering customers various materials with different adhesion levels (poor, better, best) can be beneficial, especially if the item is for novelty or daily use. Additionally, some materials may have hydrophobic coatings applied during manufacturing, designed to repel liquids and hinder ink adhesion. In such cases, the aforementioned methods may have little or no effect on improving ink adhesion.

Conclusion

Achieving strong adhesion in UV printing is a combination of selecting the right materials, preparing the substrate, and fine-tuning the printing process. By understanding the concepts of UV printer adhesion and employing the tools and tricks discussed, you can overcome adhesion challenges and ensure high-quality, durable prints.

Master UV Printing Adhesion: Get Your Free Complete Guide!

Download the Complete Adhesion Materials and Supplies Guide

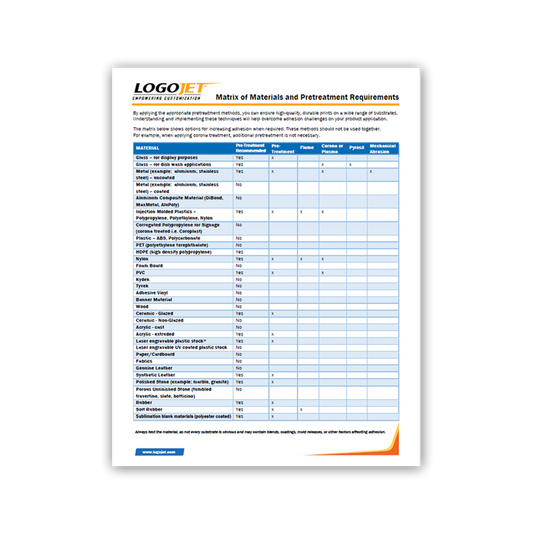
Includes a matrix that outlines various materials commonly used in UV printing and indicates whether pretreatment is required for optimal adhesion.